Step-by-Step: How to Draw a Cute Unicorn
In this 10-minute step-by-step drawing tutorial, we’ll guide you through the stages of drawing a cute unicorn. Following that, you’ll impress your kids with your drawing skills! So why not follow along? And don’t forget to subscribe to our YouTube channel!
Let’s draw a cute unicorn together!
Time needed: 10 minutes
Draw a cute unicorn in 10 minutes!
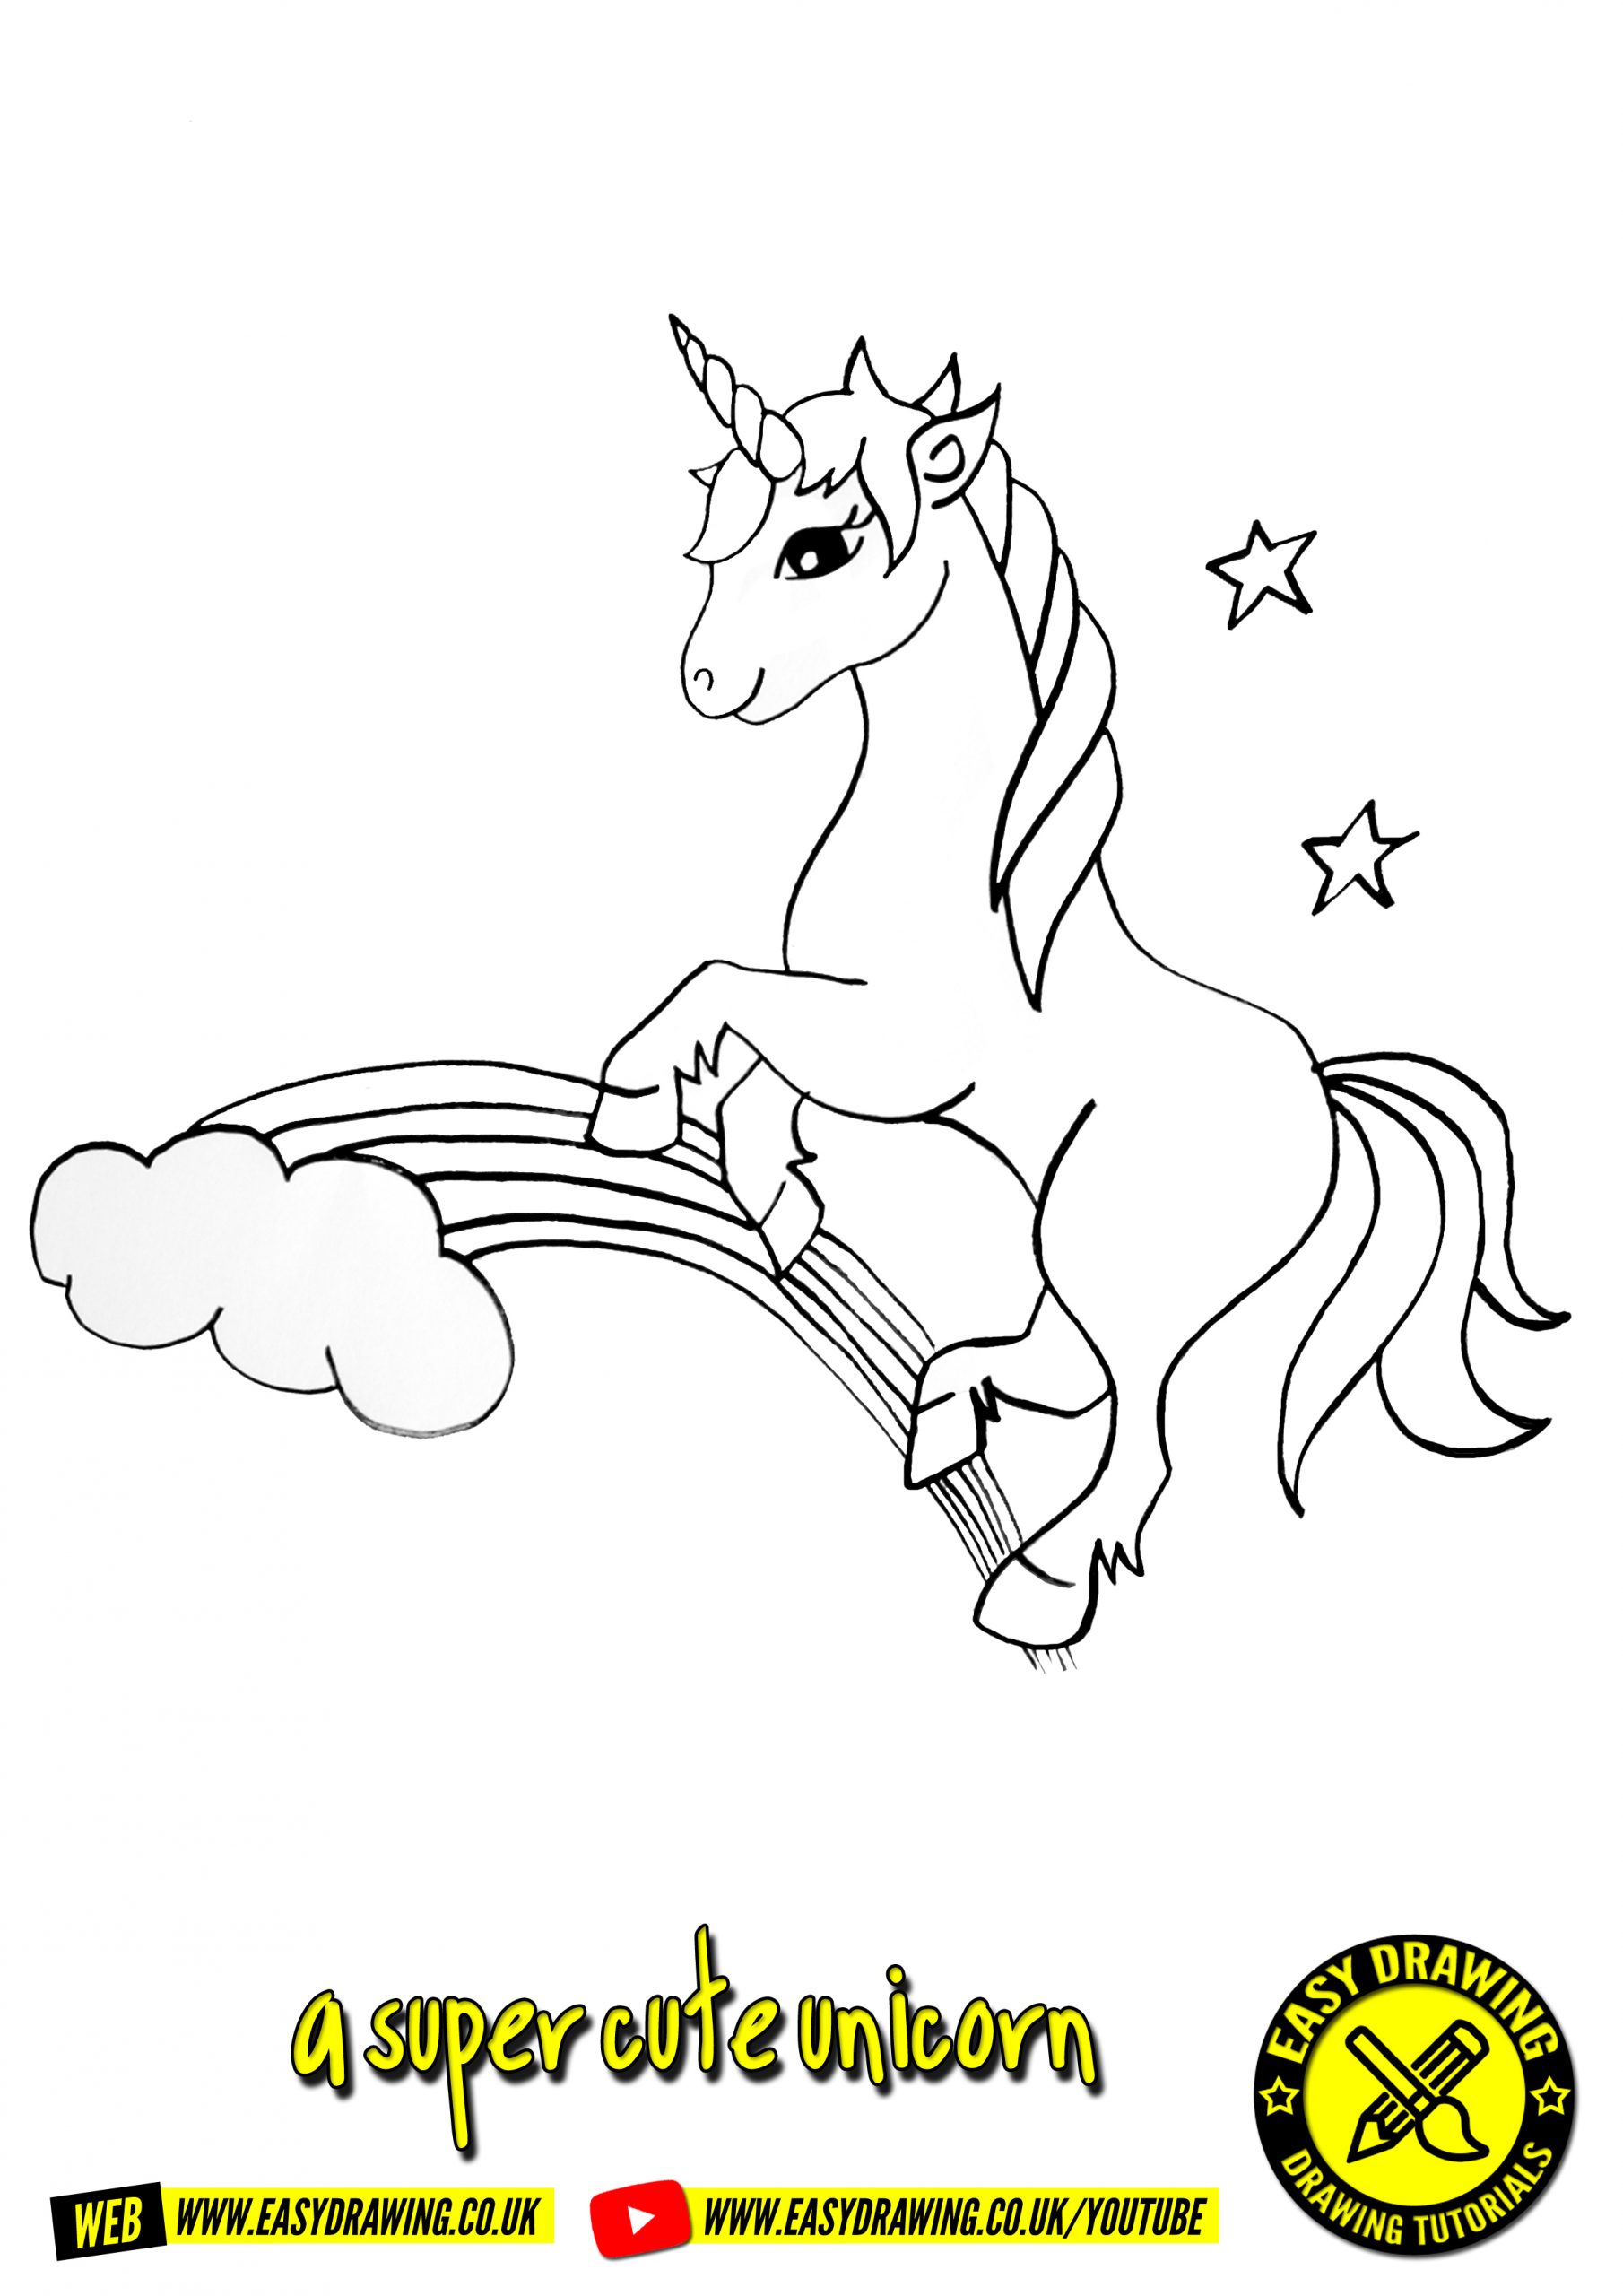
- Step 1 – Drawing the Unicorn’s Head
The best place to start when drawing this cute unicorn, is with the eye! Start with a curved upper eye lid, adding some eye lashes at the far end. Next, draw 2 smaller curves which will become the unicorn’s pupil, followed by the lower eye lid. Then finish the pupil by adding a smaller circle inside, slightly toward the left which is to be the glare on the lens of the eye. Shade the larger circle to complete the eye.
Then we’re going to move onto drawing the unicorn’s ear. It’s a sort-of pixie shaped ear, so we’re going to draw a wave-shaped line at the 11 o’clock position to the eye, followed by a curved line which forms the lower part of the ear. Add a back-to-front ‘c’ shape to represent the inner ear.
Moving on, we’re now going to draw the unicorn’s nose. We do this by drawing a fishing-hook shape to the left of the eye, adding a small ‘n’ shape toward the bottom of the hook to form the nostril.
The unicorn’s face is starting to take shape now!
Draw a line from the bottom of the hook shape in a sort of 45 degree direction toward the ear, to give the unicorn his lower jaw-line.
Then we’re going to move onto the really exciting part! Drawing the unicorn’s horn!
From the 10 o’clock position from the centre of the eye, we draw a series of 5 downward, overlapping lines from the tip of the horn down to the base, getting bigger the further you go. Reverse the process moving back up the horn on the other side, to complete the horn.
Now onto drawing the unicorn’s hair. We’re aiming for some natural looking wavy locks of hair which will help to give the unicorn a magical appearance, so we start with a point, followed by a series of curves which result in the hair looking as if its swept to the side of the horn, and rests naturally down the unicorn’s nose. Finish with a long strand of hair falling between the ear and eye.
The last thing to add to complete the head is the outline of the ear on the far side of the unicorn’s head. - Step 2 – Drawing the Unicorn’s Neck & Mane (2 minute 28 seconds)
After drawing a perfect unicorn head, we’re now going to move on to drawing the neck. We start by drawing a shallow, backward ‘S’ shape in a downward direction from the middle of the jaw line.
Then, from behind the near-side ear, draw a shallow curve toward the 4 o’clock position – being careful not to draw it too long (we want the glorious flowing locks of hair to lap over the lower half of the unicorn’s neck).
We now need to draw 2 backward ‘r’ shapes from behind the ear, down to the upper neck line, to represent the start of the unicorn’s mane. When you near the end point of the upper neck line, extend the next backward ‘r’ shape past the neck line and curve to form a shallow backward ‘s’ shape. Continue this wave pattern to form the remainder of the mane. Looking good!
Before we move onto drawing the prancing unicorn’s legs, we need to draw its back, bottom and hind leg line with a flowing line to account for the slight dip in its back, and its strong and powerful hind-quarters. - Step 3 – Drawing the Unicorn’s Legs (3 minutes 28 seconds)
We’re going to draw our unicorn in a prancing pose, so that it looks extra magical!
We’re going to start with his standing, near-side rear leg and by drawing a curve to allow for his hip, sweeping into the thigh and knee, widening again for the hoof. Add a couple of tufts of hair on the back of the ankle by drawing a zig-zag before joining the calf to the knee.
Now we move to drawing the front near-side leg, which starts by drawing a near vertical, short line, followed by a 45 degree line toward the neck, and finally a horizontal line joining the leg to the body of the unicorn. Then, create the hoof, another zig-zag tuft of hair on the rear of the ankle, before drawing a widening line connecting the thigh to the underside of the body. Draw a curved, concave, connecting line from front to back near-side legs, to form the underside of the tummy.
The far-side front leg is a quick job, having a similar profile to the near-side leg, just rotated to be underneath the unicorn to give the impression of a trailing front leg.
The far-side rear leg is drawn to show that it is raised from the floor. - Step 4 – Drawing the Unicorn’s Tail (5 minutes 5 seconds)
We now need to draw a series of ‘S’ shaped lines from the rear of the unicorn which result in 3 strands of the unicorn’s tail hair.
- Step 5 – Drawing the Stars, Cloud & Rainbow (5 minutes 35 seconds)
In seems fitting to give the unicorn a magical and colourful scene. We finish the drawing by adding a handful of stars in the sky, followed by a cloud which has a rainbow coming from it.
- Step 6 – Colouring the Unicorn In (7 minutes 22 seconds)
Now that the drawing is finished, we just need to finish it by colouring it in! Colour in as you wish, but be sure to use lots of bright colours! Happy drawing!